From blown-up to bulletproof, a 2019 Super Duty gets a new lease on life thanks to a DCR swap and a 2020+ long-block.
By now, most diesel owners are aware of the Bosch CP4.2 high-pressure fuel pump’s propensity for catastrophic failure. When it checks out, the entire injection system is contaminated with metal debris. Not only is the CP4 trashed, but so are the high-pressure fuel lines, rails, and injectors sitting downwind of it. Parts and labor can easily top $10,000 following a CP4 failure. Since the 2011 model year, Ford has used the twin-piston, 39,000-psi capable CP4.2 to fuel its highly popular 6.7L Power Stroke—and more than 2.5 million engines have been graced with it. Unfortunately, every single 6.7L Ford manufactures packs this ticking timebomb at the front of the lifter valley.
As the creators of the O.G. disaster prevention kit, an aftermarket system (now in its second generation) that effectively safeguards the 6.7L Power Stroke’s injectors from taking on metal in the event of a CP4 failure, S&S Diesel Motorsport sought a permanent solution for the root problem. In 2023, and after working closely with Stanadyne’s aftermarket division—PurePower Technologies—the answer became public in the form of the DCR Pump Conversion. The gear-driven DCR pump itself utilizes highly durable (and patented) eccentric drive pumping technology, and the bolt-on, OEM-quality (and CARB-compliant) system requires zero recalibrating of the PCM in order to run it.
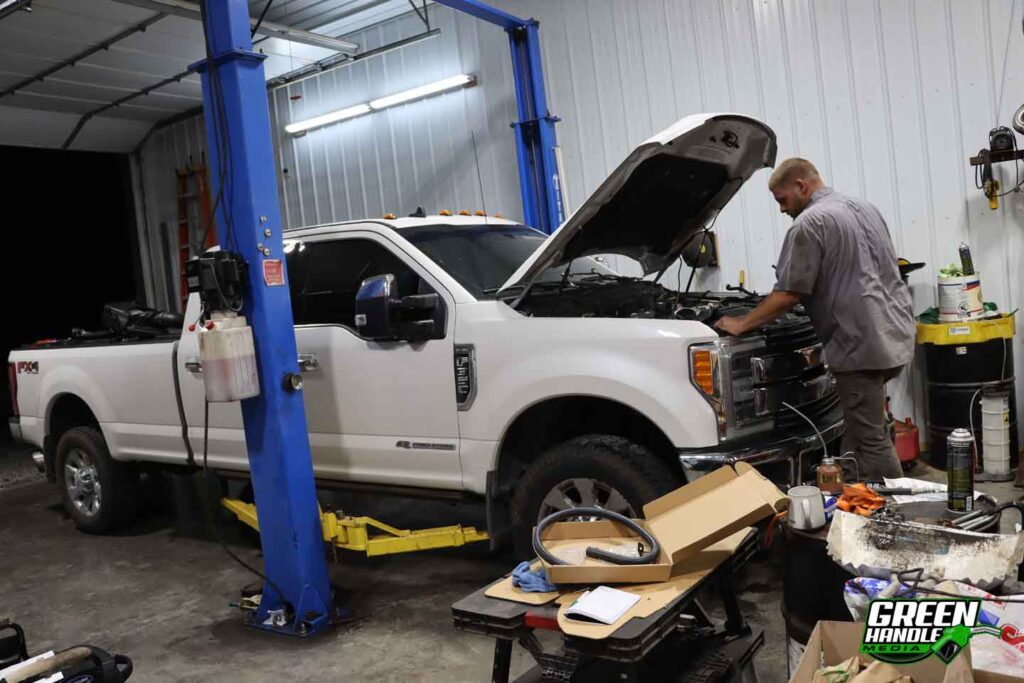
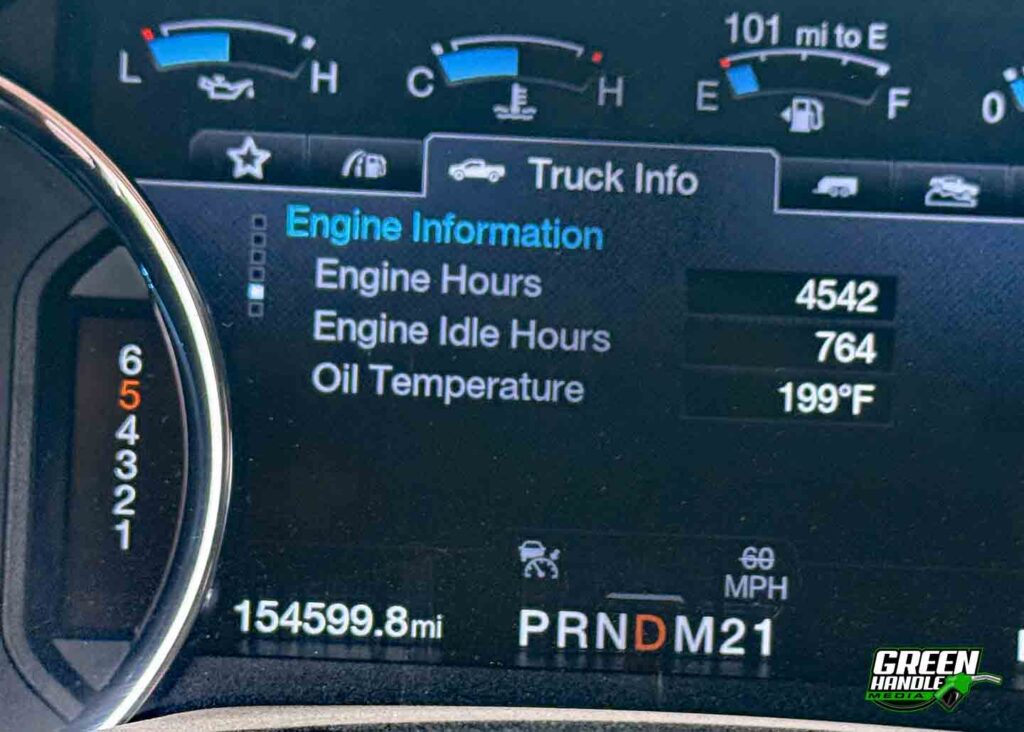
When the 154,000-mile 6.7L powering this ’19 King Ranch F-350 unexpectedly spun several main bearings, the owner decided to start over with a fresh 2020-2022 long block from Ford. Then, instead of rolling the dice on the CP4, he scrapped it in favor of S&S’s DCR Pump Conversion. Now he’s enjoying ultimate peace of mind with an engine that’s equipped with steel pistons, higher-flowing cylinder heads, and a high-pressure fuel pump that rules out the single biggest weak link on the 6.7L Power Stroke platform.
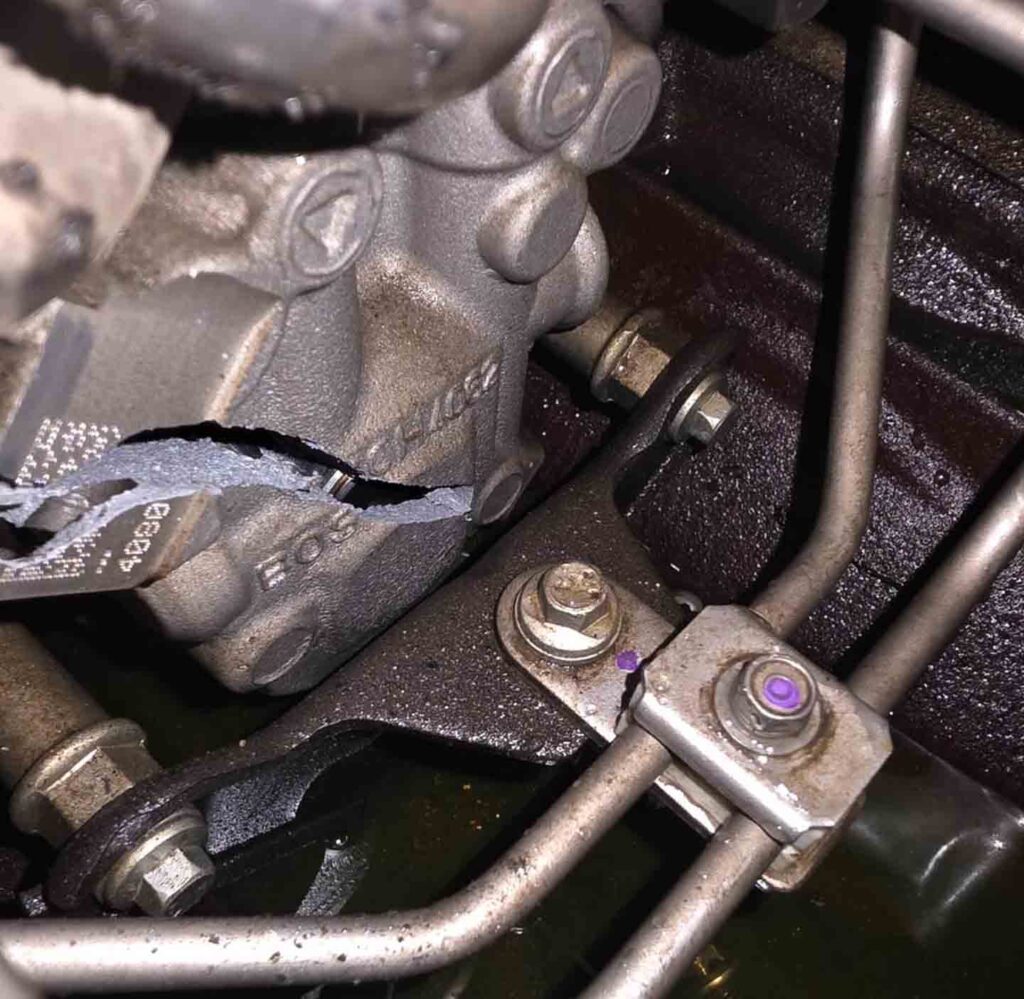
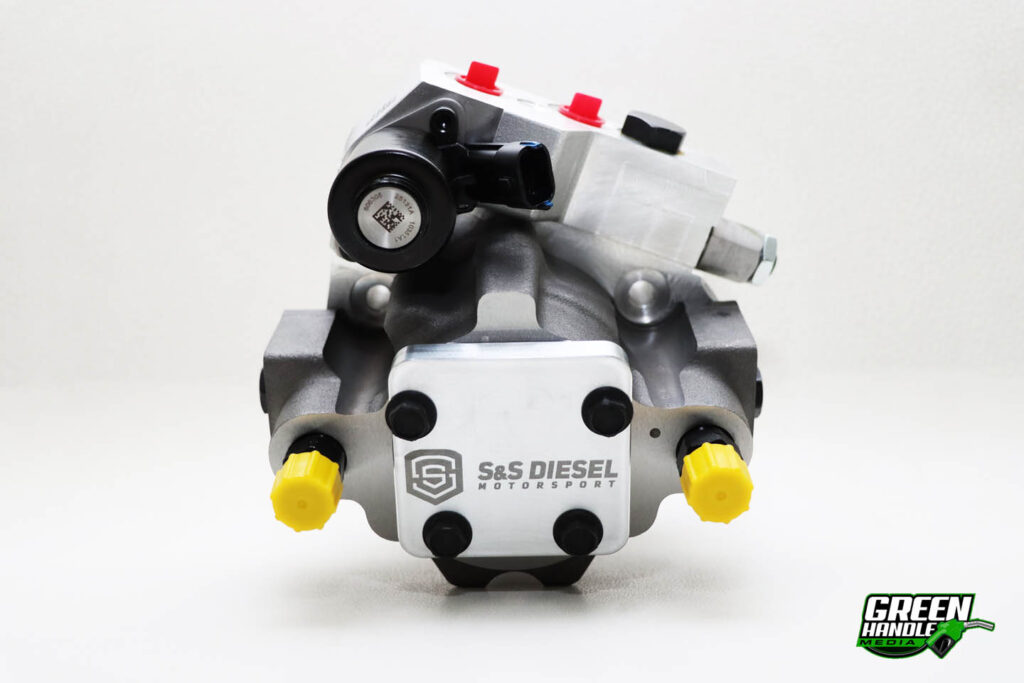
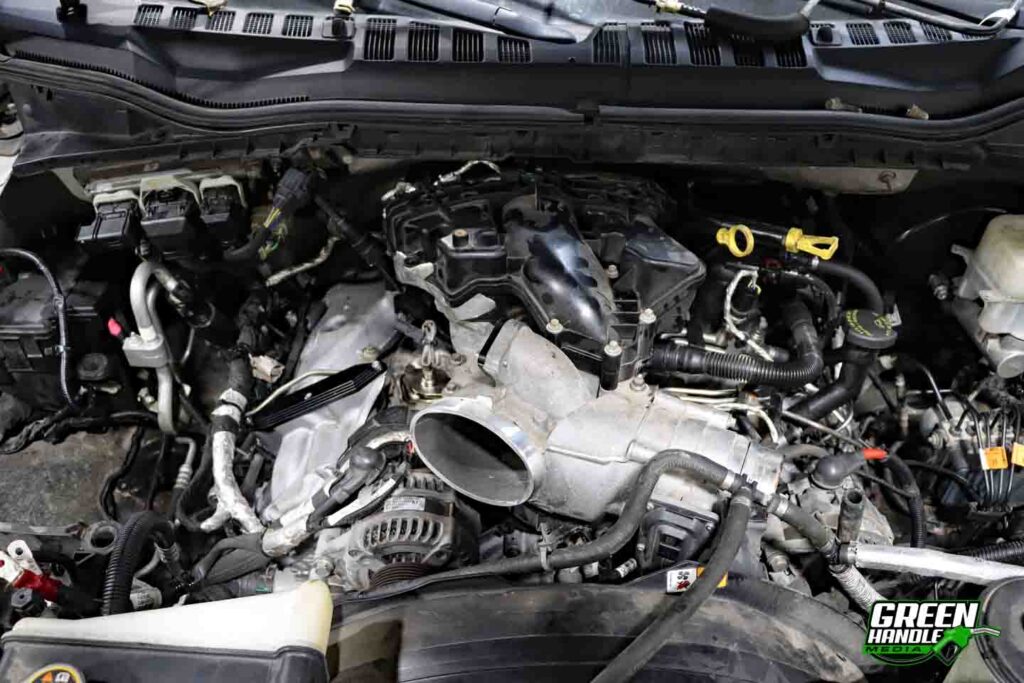
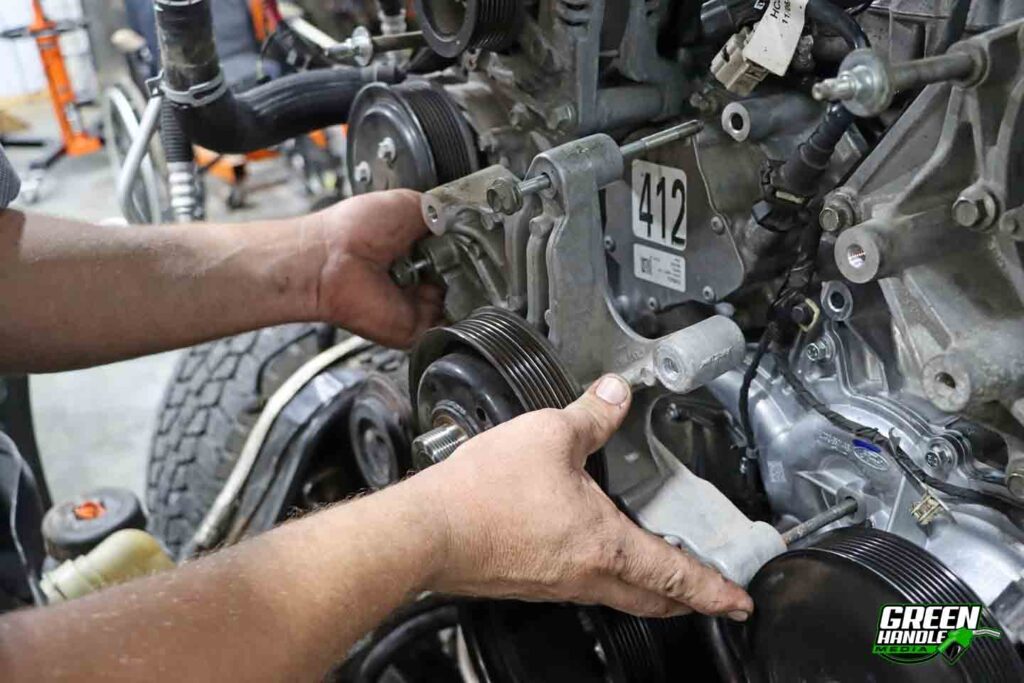
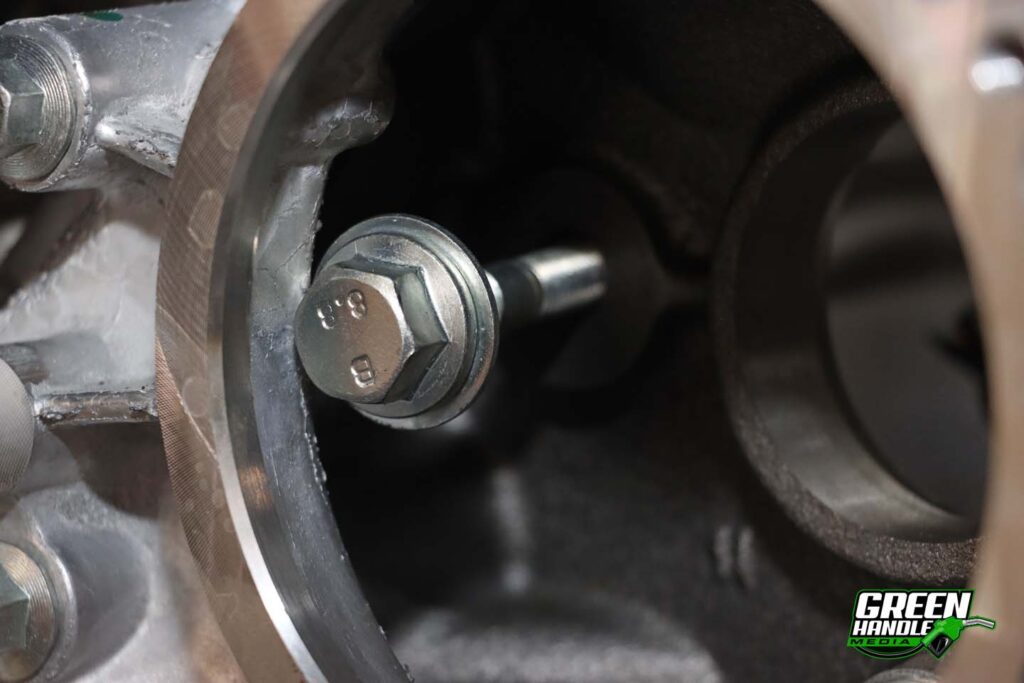
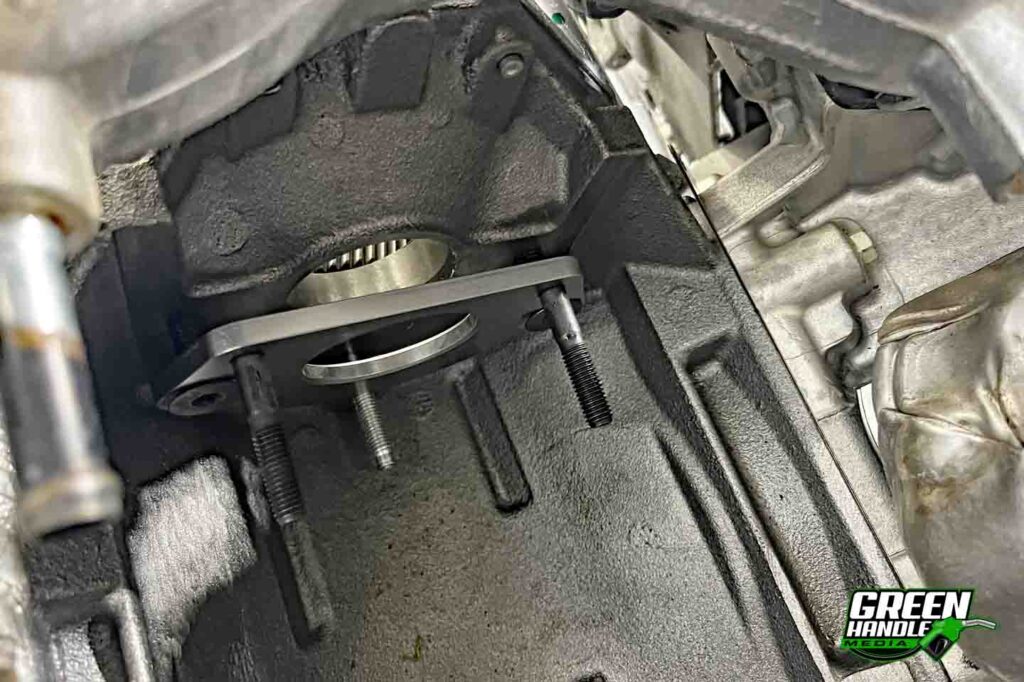
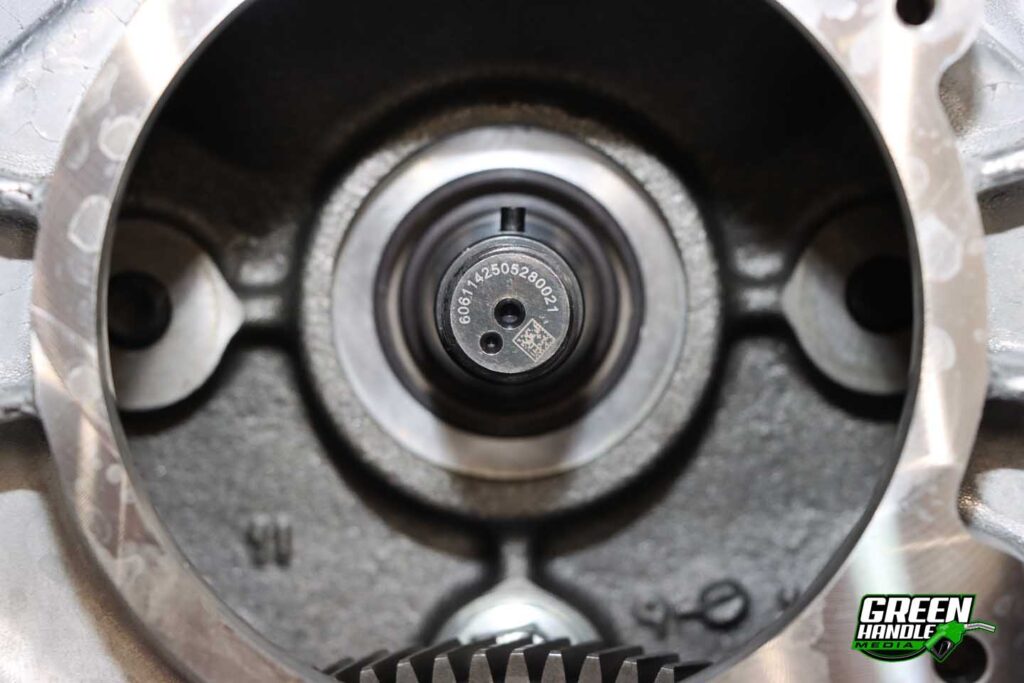
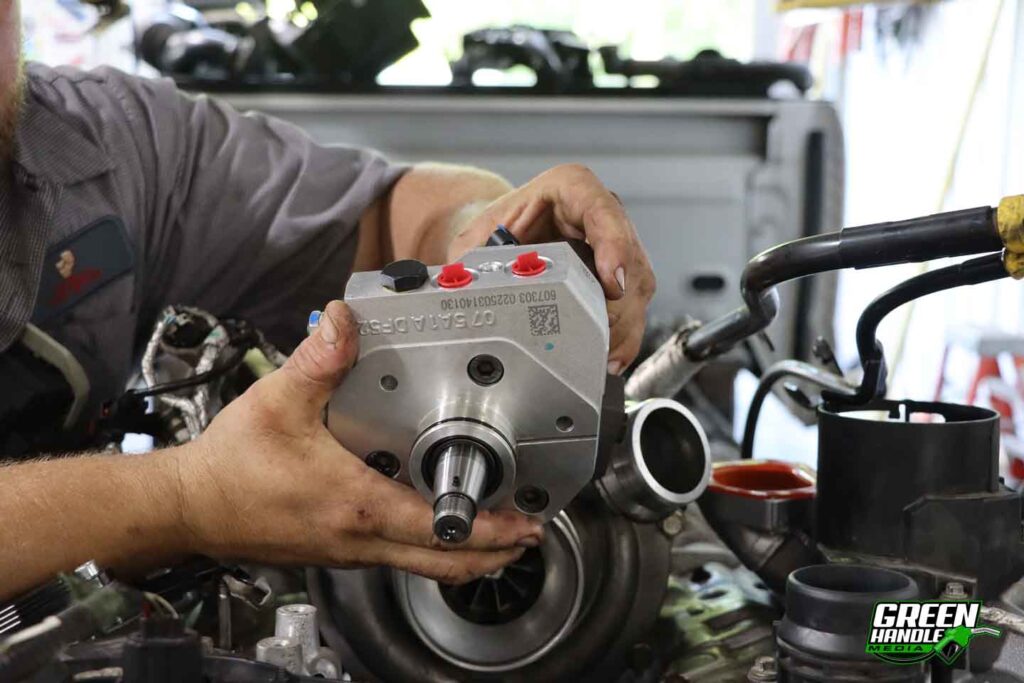
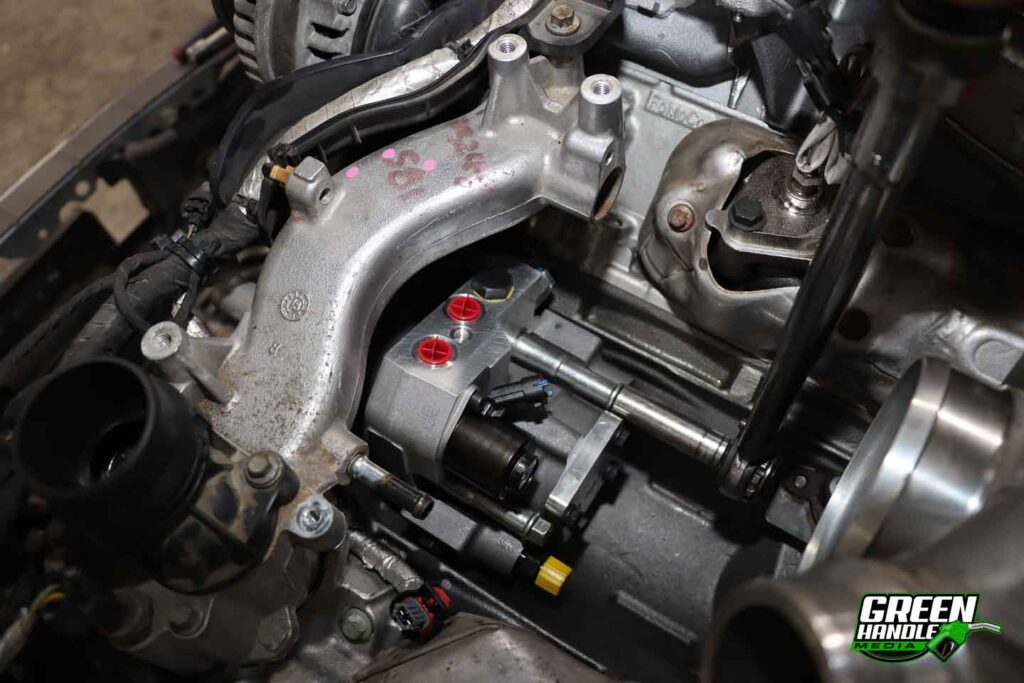
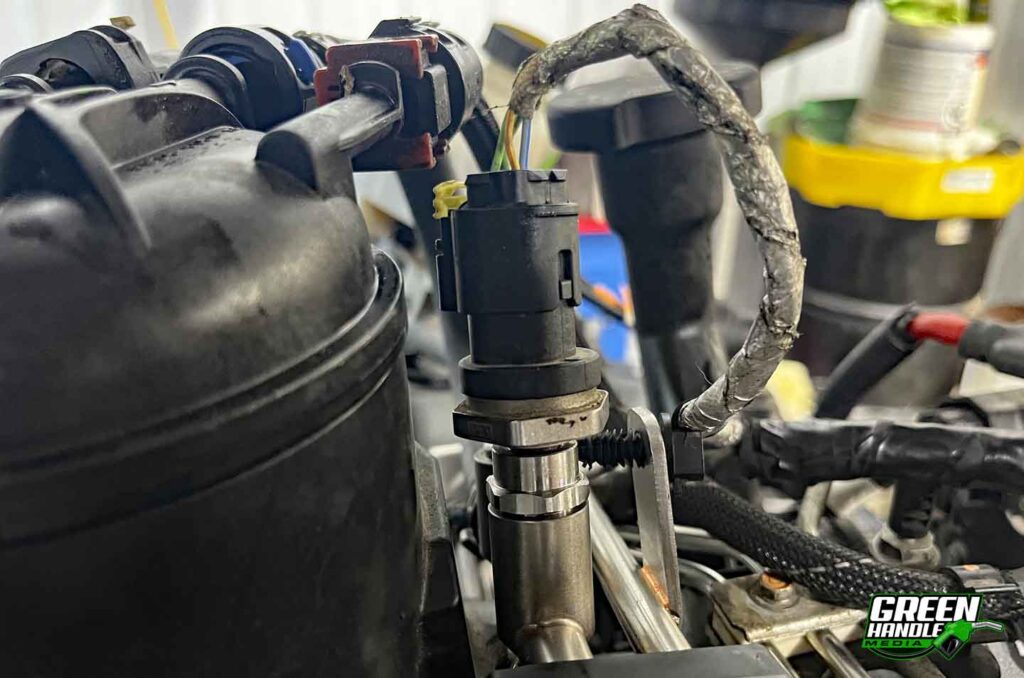
The most common form of CP4 failure culminates with finding metal debris in the volume control valve (VCV) screen and beneath the VCV within the pump case. This image came from Hassler Diesel, an S&S dealer located in Bethel, Pennsylvania that specializes in Power Strokes and that’s seen more than its fair share of self-destructed CP4’s. As far as finding a rhyme or reason for CP4 failure, miles don’t seem to matter as much as abuse—abuse in the form of air, water, some other contaminant infiltrating the high-pressure fuel system, or a lack of low-pressure fuel supply. During failure, the roller tappets are known to rotate in their respective bores, which causes them to ride perpendicular on the cam lobe beneath them. This creates immense friction and, eventually, metal-on-metal contact.Other CP4 failures are extremely violent. Take this one from WP Developments for example. When the CP4’s camshaft locked up and the engine continued to spin, the cast-aluminum case actually ended up splitting. Incredibly, an exploded case isn’t even all that rare. On this note, it’s important to disclose that any time a CP4 seizes up it can spin the crank gear… Needless to say, the CP4 can potentially lead to more than a ruined high-pressure fuel system.Different from the CP4 in virtually every way (other than both of them being two-piston pumps and compact enough to fit in the 6.7L Power Stroke’s lifter valley), the DCR pump features an eccentric cam, pressure-lubricated bushings, and what amounts to a much more robust bottom end construction. The DCR boasts a forged-steel case (vs. the CP4’s cast-aluminum one), different internal fuel routing, and delivers 1,250 mm3 per revolution. In comparison, the ’15-’22 model year CP4.2 pictured provides a maximum of 995 mm3 per revolution (with ’11-’14 versions delivering just 895 mm3).Working closely with PurePower Technologies, the aftermarket arm of Stanadyne, S&S Diesel Motorsport’s variant of the Stanadyne DCR was specifically developed to match the CP4.2’s output curve. It requires no calibration changes in order to function properly, making it a true drop-in solution for the CP4. And it’s been engineered for maximum longevity. Internally, the DCR has been designed to handle both biofuel and low lubricity fuel, and its fuel control actuator (FCA) incorporates high-quality, corrosion-resistant components and other proprietary features to keep large debris and contaminants from entering the actuator.Because we were performing a cab-off install (again, due to starting over with a Gen 3 6.7L Power Stroke long block from Ford), our install will be slightly different from the average CP4 to DCR Conversion. Pulling the upper and lower intakes, disconnecting the engine oil and transmission fluid dipstick tubes from the upper intake, and removing all fuel lines, hot and cold side intercooler pipes and secondary fuel filter (and housing) were all steps that had already been performed when the original long block was pulled. Similar to the install of a Disaster Prevention Kit, gaining access to the high-pressure fuel pump from up above is the most time-consuming part of the job.Access to the high-pressure fuel pump gear nut can only be gained by removing the 6.7L Power Stroke’s vacuum pump, and we’ll note that S&S highly recommends replacing the vacuum pump gasket on ’11-’16 engines during reassembly (PN BC3Z-2A572-A). But before that, the cooling fan must be removed using the appropriate Ford tools or a 47mm fan tool attachment and an air hammer. Then the cooling fan hub assembly must be pulled (shown). Four 8mm bolts attach the vacuum pump to the front cover.With our engine already void of a CP4, we were able to go ahead with the DCR install. However, for the average installation where the CP4 is still in place, a 27mm socket will need to be employed (along with holding the crankshaft in place) to break the pump’s drive gear nut free. Then the CP4 mounting nuts are removed from the back of the pump, followed by a tap of the pump’s camshaft nose (to break the taper-fit connection between it and the pump gear loose) in order to remove it. From there, the upper 15mm CP4 mounting bolts are pulled (shown), taking care not to drop them into the front cover.After that, the CP4’s mounting surface should be cleaned, first using a rag and cleaning solvent, and then followed by a razor blade or other type of flat scraper to ensure this spot on the block is as free of debris (and flat) as possible. The supplied engine block to DCR pump adapter plate is installed using the supplied T45 Torx countersink bolts and Vibra-Tite (blue) thread locker, with the thread locker applied to both the threads and under-head countersink face (which reduces friction during the torquing process). The countersink bolts are first tightened to 10 ft-lbs to center the adapter plate on the block, and a final torque spec of 42 ft-lbs sets them permanently in place.Blue thread locker is also applied to both threaded ends of the DCR mounting studs included in the kit. The short, threaded end of the studs are hand-tightened into the engine block to DCR adapter plate until fully seated. Then, with the three supplied mounting studs in place, the DCR pump’s pilot flange O-ring is hit with a liberal amount of clean engine oil and the pump gets installed. Once in place (and the OEM mounting nuts installed on the mounting studs but not yet torqued), the DCR’s shaft can be rotated until the alignment pin sits in the 12 o’clock position (shown).
Tips For Setting The DCR In Place
1) The high-pressure rail-to-rail fuel line may need to be secured out of the way in order to install the DCR (note: ours was removed during the install).
2) Do not bend or use excessive force to get the aforementioned rail-to-rail fuel line out of the way.
3) Don’t use the DCR’s mounting bolts to pull the pump into position, as it could damage the pilot flange O-ring.
4) You may have to massage the passenger side exhaust manifold’s heat shield toward the exhaust manifold for improved clearance when sliding the DCR over the mounting studs.
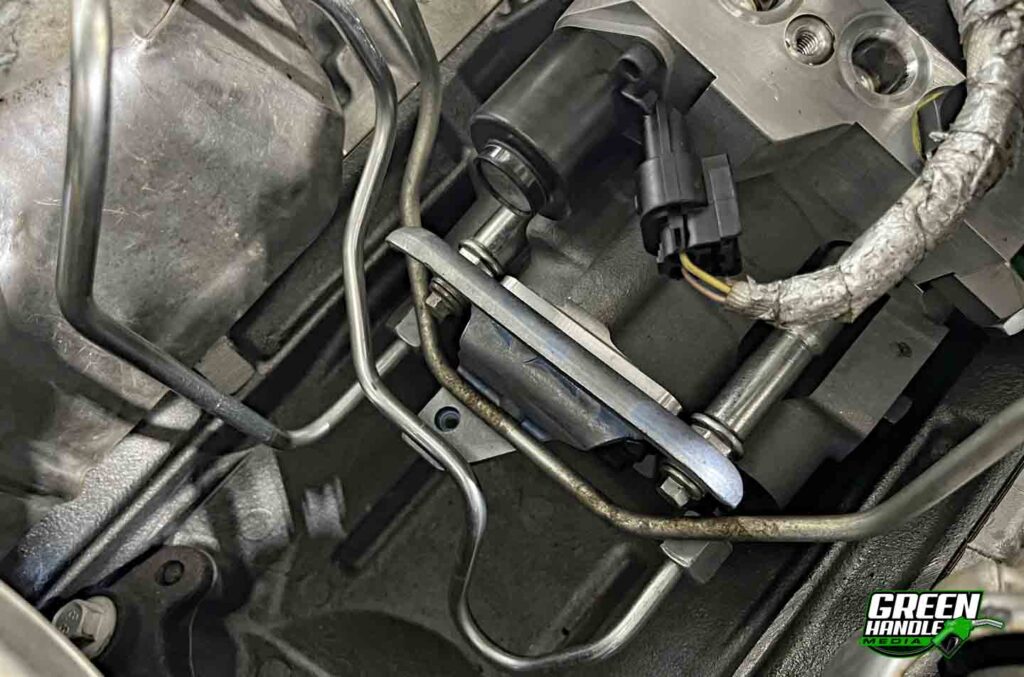
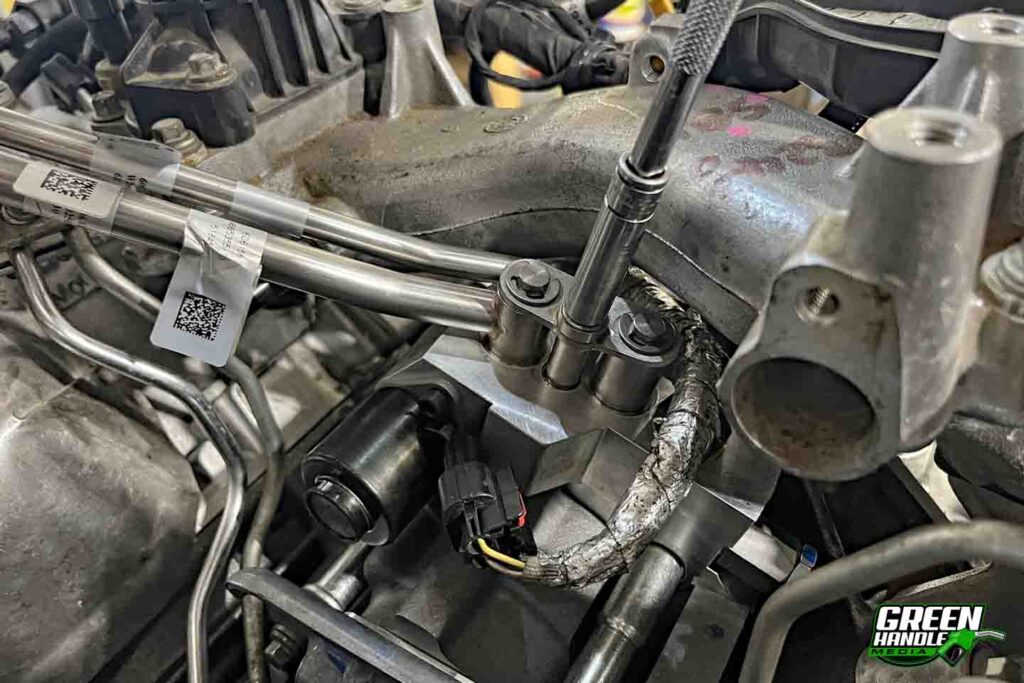
The fuel pump drive gear should be installed in the same orientation it was positioned in during removal of the CP4, with the single timing mark on the engine’s camshaft gear set between the dual timing marks of the fuel pump gear (shown). Once the gear is in, its drive gear nut is torqued to the factory CP4 spec of 60 ft-lbs. Just in case the engine attempted to turn over, we used a spare set of hands on the crankshaft’s damper bolts to hold it in place.With the fuel pump drive gear nut torqued (and per S&S Diesel Motorsport’s detailed instructions) we turned our attention back to the three DCR mounting studs in the lifter valley. Here, a two-step torque sequence is called for. First, and beginning with the bottom nut, each of the three mounting nuts is torqued to 10 ft-lbs. On the second pass (again, starting with the bottom nut), each nut is tightened to 18 ft-lbs. It’s vital that these three nuts not be over-tightened (as well as many other fasteners throughout the 6.7L Power Stroke fuel system), so make certain your torque wrench is calibrated and accurate.S&S provides detailed steps for installing the 6.7L Power Stroke’s high-pressure fuel lines—and if you want to avoid any routing headaches it’s worth following them to a T. Start with the shorter, driver side high-pressure fuel line first. It connects to both the DCR and the third port on the driver side fuel rail, with its nut receiving a 26 ft-lb torque spec. Next, the passenger side high-pressure fuel line is hand-tightened to the second port on its respective rail, with its nut also treated to 26 lb-ft. From there the provided high-pressure fuel line tail support bracket gets installed (shown), followed by the factory rail-to-rail crossover line being connected (hand-tight) to the first port on the driver side fuel rail.Once each end of the high-pressure fuel lines are correctly routed and connected, they are secured beginning with hand-tightening the saddle bracket that installs on the DCR’s tail bracket assembly (which secures the high-pressure crossover and passenger lines). The triple line saddle brackets are installed above the driver side valve cover (shown). Before the saddle brackets are torqued to spec, make sure all high-pressure fuel line nuts at the rail ports are torqued to 26 ft-lbs. Then the saddle brackets, beginning with the DCR’s tail bracket, are torqued to 89 in-lb. At this point, we elected to install the vacuum pump. It would be followed later on by reinstalling the cooling fan hub, serpentine belt, and cooling fan.The supplied low-pressure fuel line assembly integrates seamlessly with the factory configuration. When installing the low-pressure line into the DCR, its O-rings should be hit with a coat of fresh engine oil and we took care to wiggle the assembly while pressing it into place to avoid damaging its O-rings. Then, with blue thread locker applied to the factory hold-down bolt, it was tightened up and torqued to the required 89 in-lb specification. We’ll note that the low-pressure fuel line assembly also receives 89 in-lbs at its mounting location on the valve cover.Because proper fuel supply pressure is vital for any high-pressure fuel pump, S&S includes the appropriate fuel pressure and sensor adapter for 2015-2019 6.7L Power Stroke engines (shown), as well as 2020+ engines. Once the supplied plug and adapter were installed in the new low-pressure line assembly, we set to work reconnecting the factory supply and return lines and sensors, and reinstalling the upper and lower intake manifolds, CCV hose, and the intake air throttle’s electric connector. After lowering the truck’s cab, the transmission and engine oil dipsticks, coolant overflow tank hose and vacuum lines, hot and cold-side intercooler pipes, MAP sensor, MAF sensor, and batteries were all reinstalled.Before firing up the brand-new engine and DCR for the first time, we made sure the fuel system was fully primed by cycling the key to the ON position (and not starting the engine) for five, 30-second intervals. Once the engine was started, all high and low-pressure fuel connection points were inspected (many using a telescoping mirror and flashlight) for leaks. When the truck passed the test, the Super Duty was roadworthy once again. This time, its owner can take comfort in knowing a superior design high-pressure fuel pump is fueling his Power Stroke—and the days of worrying about a sudden, cataclysmic failure costing him $10,000 to $15,000 in repairs are in his rear-view mirror.